Power Platform tools provide many built-in features, but with the help of development skills, it is possible to fill gaps and solve complex challenges. The options are limitless, from creating technical designs to configuring the Dataverse and developing integrations. Now, let's look into one excellent example that utilizes two of the Power Platform tools! The tools we will be using in this sample are
- Power Automate, which is used to automate tasks and build robust solutions.
- Power BI, which is used to make better decisions by displaying and analyzing data for insights.
Let’s say you have employees within your company who require information about your user licenses. A process that usually requires looking at thousands of rows (in most cases through an excel spreadsheet) to find only one small piece of information. Microsoft tools can help you save the time and headache of reviewing this mountain of data!
With the help of Power Automate, you can make flows that run on-schedule or on-demand that can pull details like Client Id and Credentials by using the GET method to grab the details from the API. You can then save that information to a file on platforms such as SharePoint or output this data to Power BI to create powerful visualizations for better analysis.
To create this flow, you first need to create a custom flow connector to access the license information in Microsoft Graph. This requires you to create a new app in the Azure Portal (Remember to store the Tenant ID and Client Secret value for later use).
Next, you will need to grant API permissions.
At this point, you can create a postman collection. This step is optional but immensely helpful for debugging purposes.
Now that you have all these details, it's time to create the flow in Power Automate and see the magic!
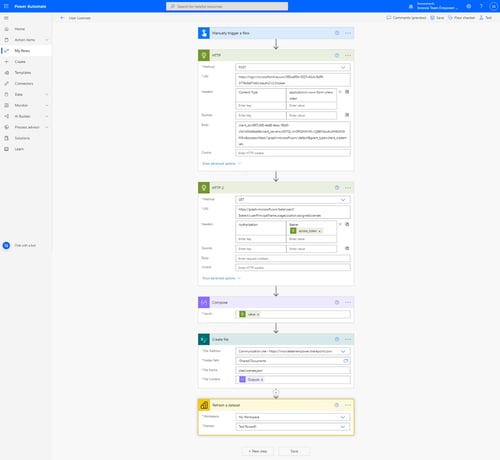 What the final flow in Power Automate will look like.
Steps to Creating the Flow in Power Automate
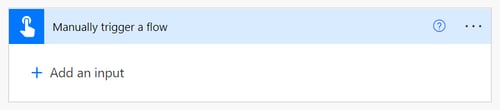
In the first step, the flow is manually triggered.
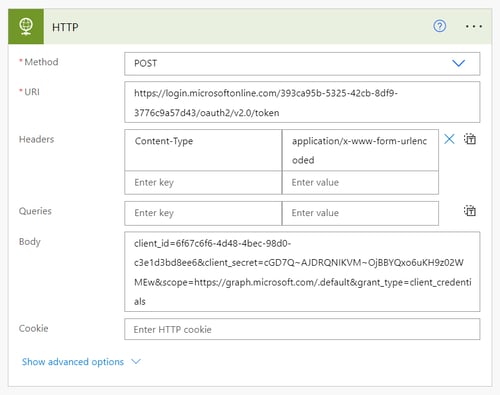
The next step is utilizing HTTP actions to invoke a REST API.
In the first HTTP action, we provide the Tenant ID in the URI and the other details about the custom connector that you have stored from the Azure Active Directory you created earlier.
In the second HTTP action, we provide the query that you earlier used in Graph Explorer to access the user license details.

In the fourth step, we take advantage of the Compose action to store the results from that API call to Microsoft Graph.

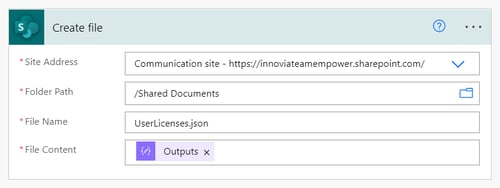
Next, we create a file with all the details we just obtained in a SharePoint Folder.
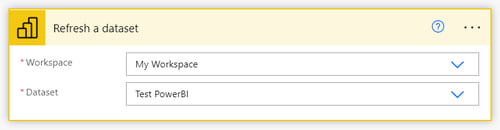
The last step refreshes the Power BI Dataset which is used to make meaningful conclusions out of the data.
The end result is, whenever the flow is triggered, it will always have the up-to-date user licenses and will refresh the dataset in Power BI so that the visuals are also up to date.

Are you interested in using Power Automate and Power BI for your business's unique needs? Schedule time with your Innovia Customer Engagement Specialist today to learn more.