EFT, also referred to as ACH, involves electronically submitting payment files to the bank, typically in NACHA formats such as CCD or CTX. While Business Central (BC) and NAV share many similarities in the overall EFT process, BC includes native support for both NACHA formats and introduces minor enhancements within the Payment Journal. One of the most notable improvements is the ability to automatically email remittance statements, along with the option to easily recreate and resend those remittance emails when needed.
Setting Up
There Are Five Key Areas to Setting Up Your EFT:
- Bank Account Card – The bank account card must have several things set up in order to use EFT and should be repeated for all banks that will be using EFT:
- The Bank Account No. – this must be present in the General section of the Bank Account card
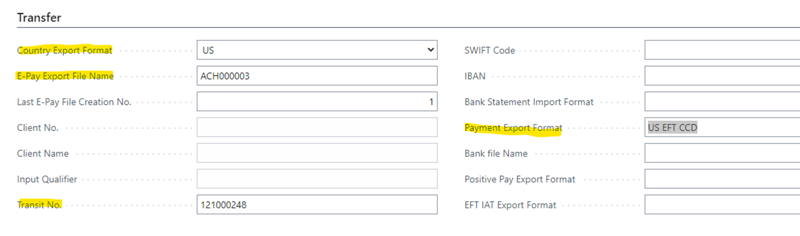
- Country Export Format – must be set to US
- Pay Export File Name – this is the NACHA file name that exports. I generally use something to the effect of ACH0000001 as the start number
- Payment Export Format – select US EFT CCD or US EDT Default (which is CTX)
- Transit No. – this is your bank’s routing number
For anyone that recalls in NAV, there were two paths that you had to set, that’s where the Export and Transmit file will drop to. While you can still see these if you’re in Design mode, they’re no longer required for BC. Instead, the files drop into your download section.
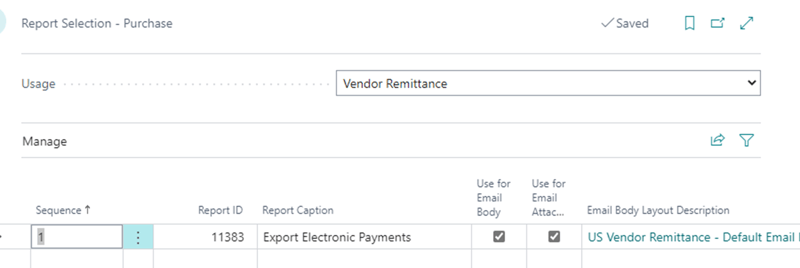
- Report Selection - Purchases – Go into Report Selection -Purchases and usage: Vendor Remittance, set the report to 11383. If you have a custom template or custom email, attach it here.
You can also select the V. Remittance or what’s known as Vendor Remittance – Posted Entries. This is the report that runs for EFT vendor remittances after the fact. So if you missed it the first time or the customer is saying they never got the email, this is the report used to resubmit it. Be sure to use Report ID: 400. It cannot be the same as 11383 otherwise, it will continue to print the batch in Payment Journal or just give you errors/blanks.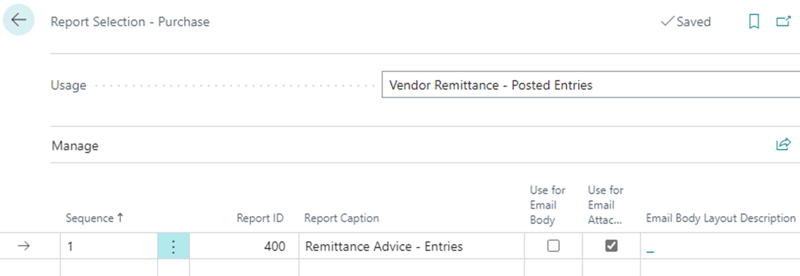
- Vendor Card Bank Account– Next up, go to the Vendor Card and select Bank Accounts under Navigate. Create a new one if one doesn’t exist, or you can edit one that already does.
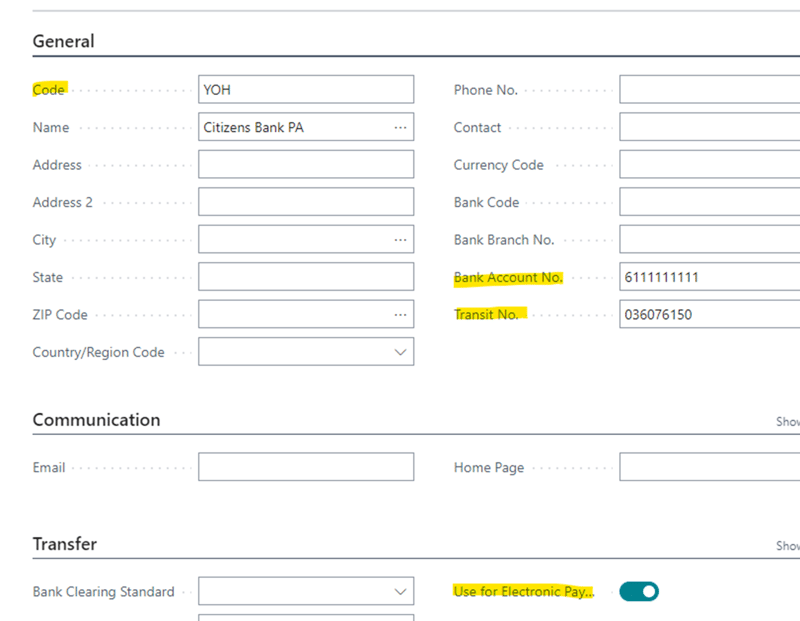
- You’ll need a Code – so people use an abbreviation of the vendor name, the bank name, or some other identifier.
- The Name is the Bank Name and address, though it does work if not provided.
- Bank Account No. – enter the account number of the vendor’s bank account
- Transit No. – this is the vendor’s Bank Routing number.
- Under Transfer, select Use for Electronic Payment is on. If this is not selected, it can actually result in the system not being able to process this vendor for ACH.
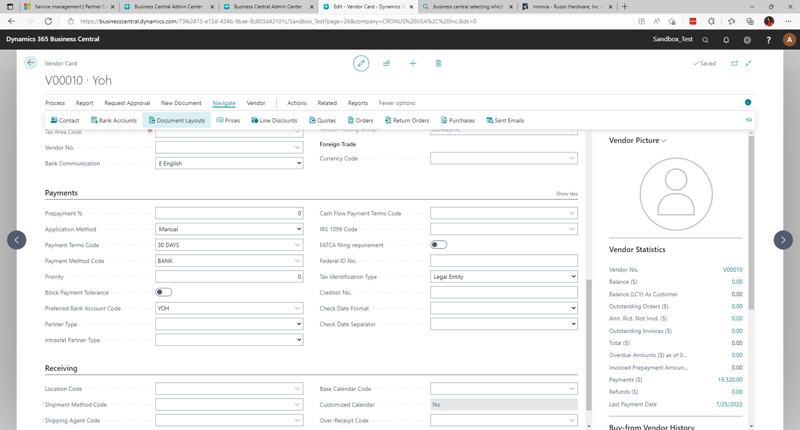
- Vendor Card – back on the Vendor Card itself under the Payment section
- Payment Method Code – should be set to ACH or what code in your payment terms codes means ACH/EFT to you. In Cronus, that code is BANK.
- Preferred Bank Account Code – select the bank account code setup prior. A vendor may have several, so be sure to select the most common one. If this is left blank on the payment journal, you’ll have to select the bank account to use.

- Vendor Card Document Layouts – While it seems a little duplicative, you do have to set up what vendor remittance and v.remittance a vendor will get and specify which email or emails will get that document. On the vendor card, under Navigate, go to Document Layout.
- Select the Vendor Remittance under usage, the Report ID 11383, and the send to emails. You can do multiple emails by using an “;” between the emails. Check-mark the Use for Email Body and select the Email body text you want to use.
- For after Posted Remittance, select the Vendor Remittance – Posted Document under Usage and report ID 400. Select the email(s) needed and email layout information.

Want To Learn More? Watch Our Webinar
Save Money and Pay Faster With EFT in Business Central
Using EFT
Start your payment journal like usual, using suggest vendor payments and selecting the run date you want the report to run through in Last Payment Date, select which bank account is being used and Bank Payment Type: Electronic Payment. For filters, select the Payment Method Code that aligns with your EFT batch:

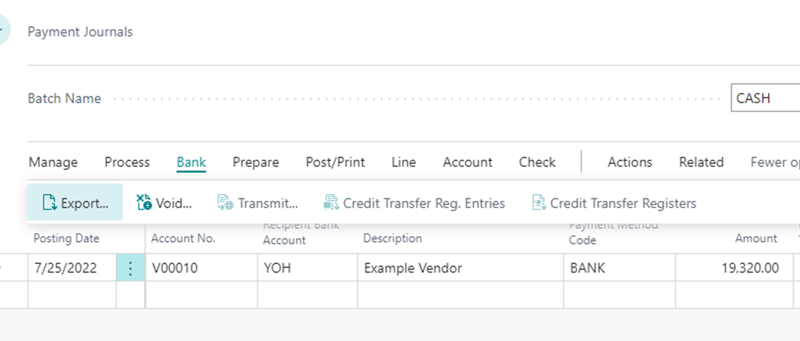
If setup correctly on the vendor card, the Receipts Bank Account should have filled out for you. The type should be set to Electronic Payment. Be sure a Bank Account is being used vs. a GL Account to the cash account.

At this point, your batch is ready – either use approval workflows to get approval or use the requirements your company has in place for approving batches. Once approved, if required, go to Bank >> Export. On the pop-up, you can select to email it, which will generate a vendor remittance statement and email it to your customer for which invoice(s) are being paid with the EFT batch. Otherwise, print out to another method such as PDF, Word, or Excel.
If it fails at this stage, you may have one of the following problems:
- The bank account card isn’t setup correctly to have an Export for the ACH file type
- There’s a blank line on the current batch
- There’s another batch on a different batch name that’s causing an issue for this batch
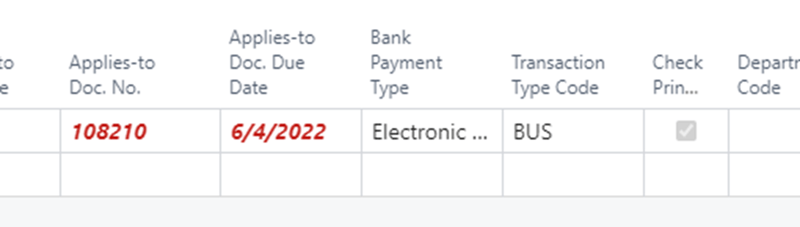
- The vendor card isn’t set up correctly for ACH – which will result in the vendor’s name appearing in red
- There’s a mismatch, and electronic payment is not being used, or you’re missing the recipient’s bank account
The export, unlike in NAV, will show up in your Downloads folder. Once exported, the Check Print will be selected, which will allow you to move on.
Go to Actions >> Functions >> Generate EFT File
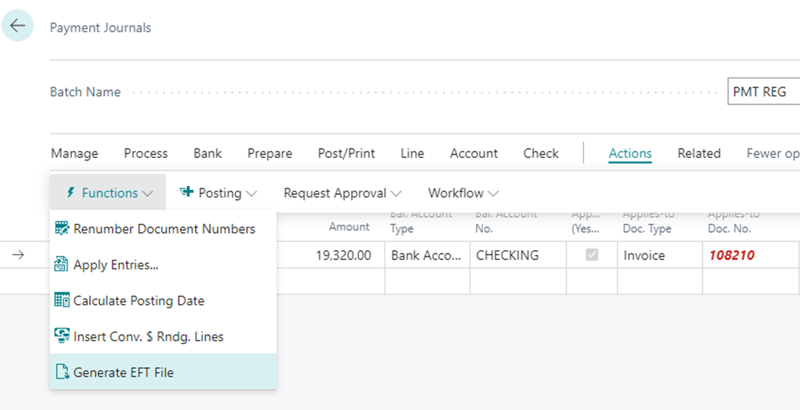
In the new window, select all the files to include and hit Generate EFT Files…
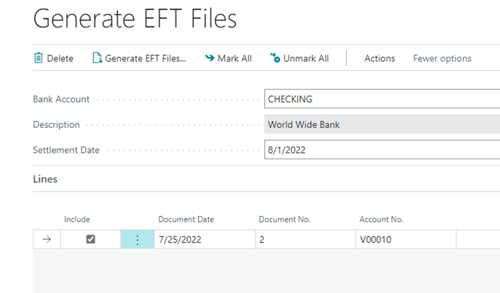
This will download a NACHA file or custom file depending on the setup in your bank account card. This file can be submitted to the Bank to generate the EFT file in the Bank.
You’re now done!
Well, sort of, now all that’s left to do is Post the batch.
This blog was updated 2/10/2026.