When it comes time to make a new budget, are you thrilled? Or perhaps feeling an emotion that is not so nice ... It doesn’t have to be that way! Taking advantage of NAV/Business Central’s budgeting features can save you time. You may even start to love budgeting!
There are two major types of budget in NAV/BC: G/L (General Ledger) Budgets and Sales Budgets. In this blog, I will discuss how to manage G/L Budgets, including:
- How to set up a new budget
- How to populate data in budgets
- How to export budget data to Excel and re-import it after modification
Note: Screenshots used are from NAV 2018, but the process has not changed much in Business Central.
How to Set Up a G/L Budget
Let’s start by creating a new budget.
- First, you will need to enter a G/L Budget name.
- Tip: You can have multiple budgets for the same periods by creating budgets with different names. The budget name is included in the budget entries you make.
- Global Dimensions 1 & 2 automatically populate.
- You may enter up to 4 more dimensions if you wish.
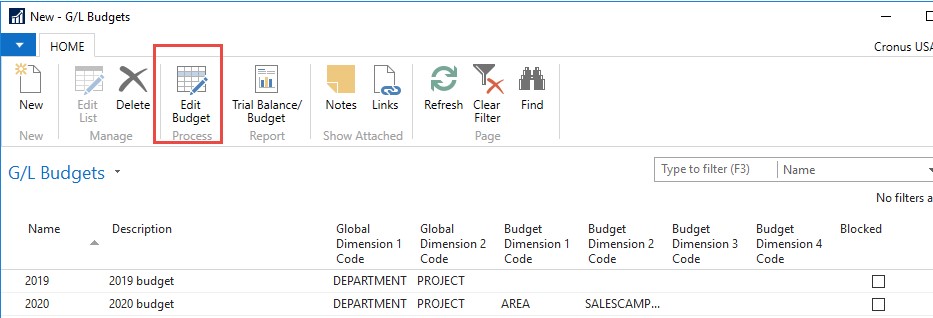
- Next, select Edit Budget.
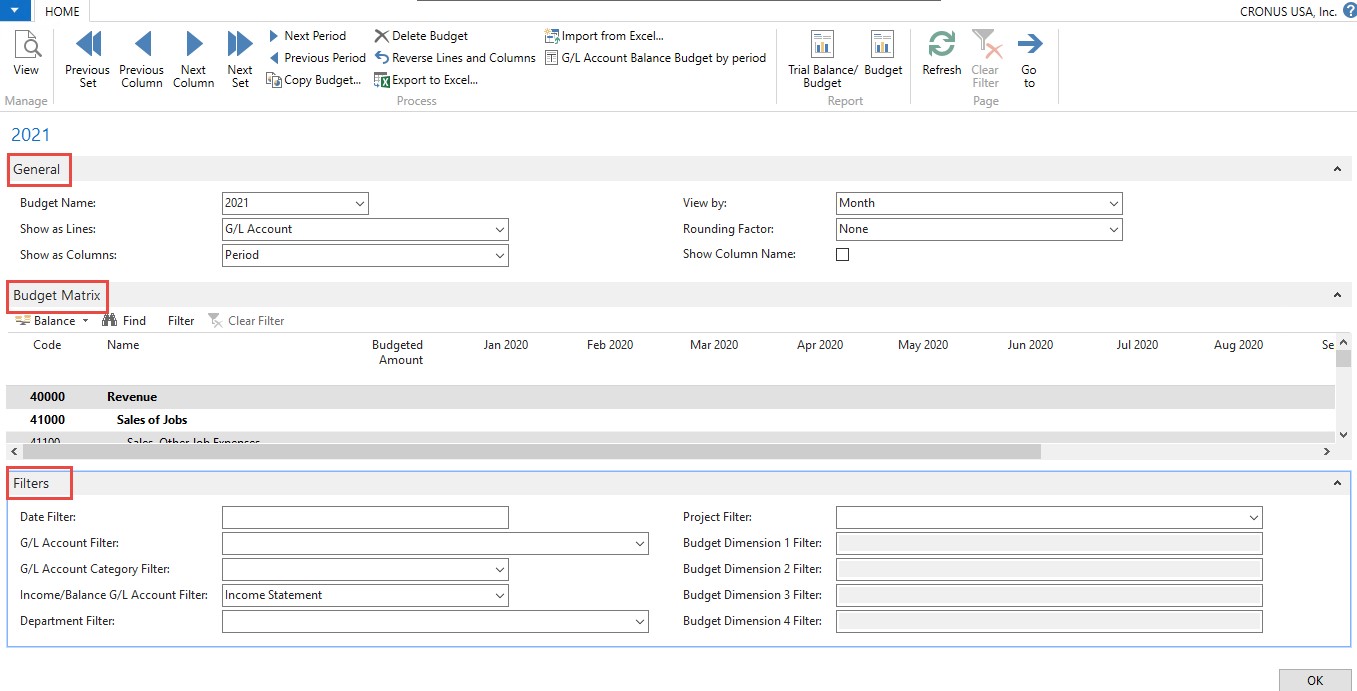
- This page is divided into 3 FastTabs: The General FastTab, the Budget Matrix FastTab, and the Filters FastTab.
- Let’s first look at the General FastTab. Here you can change what you would like to see on the lines and columns. The columns will be displayed based on the “View By” selection. For example, if you have the columns set as Period, your options would be "Month, Day, Year, etc." in the "View By" field. In this section, you can add a rounding factor and set the budget to show the name on the column instead of the code.
- The second FastTab is Budget Matrix, which is used to populate your budgets.
- The third FastTab is Filtering. These settings allow you to add filters based on date, G/L Account, G/L Account Category, Income/Balance G/L Account, and Dimensions.
How to Populate Your Budget Data
It can be a lot of work setting up a budget from scratch. Dynamics NAV/BC has incorporated a few shortcuts that help you create budgets quickly.
Option 1: Manually Enter Budget Data
While this method is a little boring, it works perfectly well. You can manually enter the data into the fields in the Budget Matrix.
After you have created a Budget, you can go to each line and enter the budget amount based on how it is displaying. For instance, if you have the rows displayed as G/L Numbers and the Columns displayed by Month, you can manually enter the budget amount for each month.
This can be tedious.
Note: If you have a Begin total line and an End total line, it will calculate the end total for you.
Option 2: Copy Budget Data
If you select Copy in the ribbon in the edit budget window, you can populate data based on General Ledger Entries (from actual numbers) or from General Ledger Budget entries (from budget numbers). If the budget needs to be changed, you can override the budget numbers with new ones or use the Adjustment Factor field to adjust the numbers in your new copy.
Tip: Since you need to be in the Budget you want to copy from for this step, you need to create the budget you want to copy to first.
The Copy Options screen has three sections: Where are you copying from, where are you copying to, and how are you applying the data.
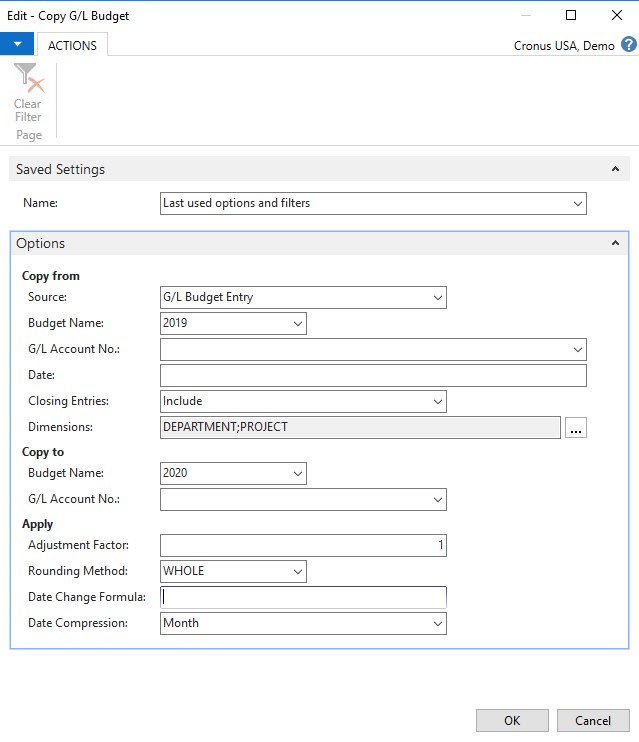 Definitions of the fields when using the Copy Budget:
- Copy From section:
- Source: Select what amounts you want to copy (G/L Entry or G/L Budget Entries).
- Budget Name: Enter the name of the general budget to be copied.
- G/L Account No.: Select the account numbers to be copied.
- Date: Enter the period for which the budget is to be copied.
- Closing Entries: Select whether the closing entries are included or not.
- Dimensions: Select which Dimensions are included in the new budget.
- Copy To section:
- Budget Name: Enter the name of the budget you want to copy to.
- G/L Account No.: Enter General Ledger account numbers to copy to.
- Apply To section:
- Adjustment Factor: Enter an adjustment factor to multiply the amounts you want to copy, allowing you to increase or decrease the amount being copied. For example, if you enter an adjustment of 1.1 it would increase the amount by 10%. If you enter an adjustment of .90 it would decrease the amounts by 10 %.
- Rounding Method: You can select a rounding method for the entries copied.
- Date Change Formula: Specify a date formula to change the dates on the entries that are copied (example: to copy from last month’s budget to this month’s budget use formula 1M).
- Date Compression: Select the unit of time you would like entries combined into.
How to Export to Excel and Re-Import
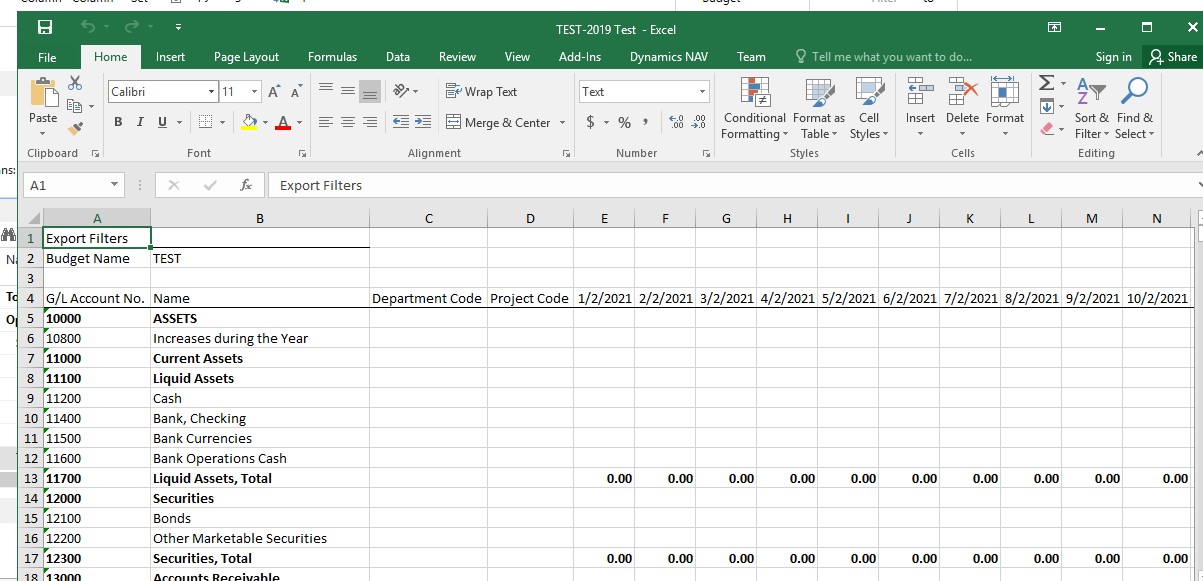
You can parse out budgets to make it easier for department heads to work with their budgets.
To parse out budget data into different Excel spreadsheets, select Export Budget to Excel. This export can be filtered based on Amount, Global Dimensions, Dimension, Budget Name, Business Unit code, Date, Description, Dimension Set, Entry No, G/L Account No, Last Date Modified, and Project Code or User ID.
Export Budget to Excel
As an example, I have filtered the export based on the Department, which is a Global Dimension. The filtered data will export to Excel. Then I can send the report to the person responsible for the administration department’s budget.
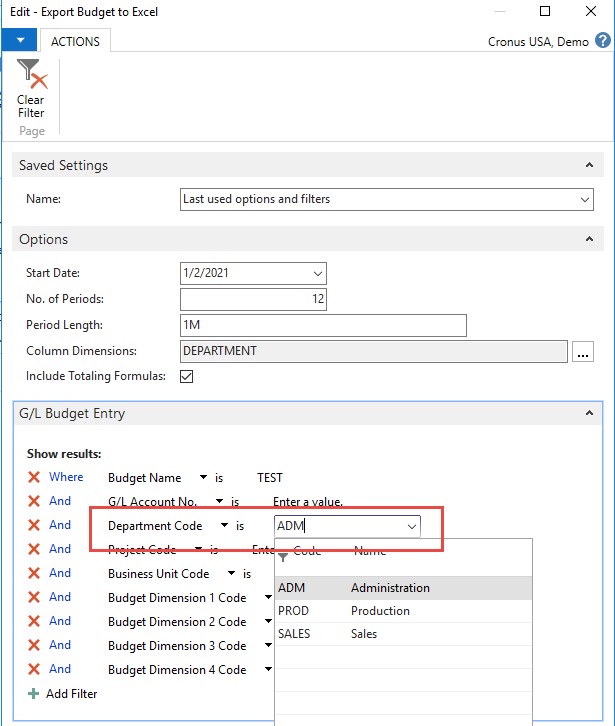
Definitions for Exporting the Budget to Excel:
- Start Date: Enter the Starting date of the Budget.
- of Periods: Number of Accounting periods.
- Period Length: The length of the Accounting periods (example: 1M = monthly).
- Column Dimensions: Specify the dimensions you would like to include.
- Include Totaling formulas: To include sum formulas in Microsoft.
- G/L Budget Entry: Select any other appropriate filters.
Import Data Back into Dynamics NAV/BC
After receiving the modified Budgets back, import them into the same Budget after selecting the Option “Add entries” instead of “Replace entries.” The data you upload will be added to your existing budget.
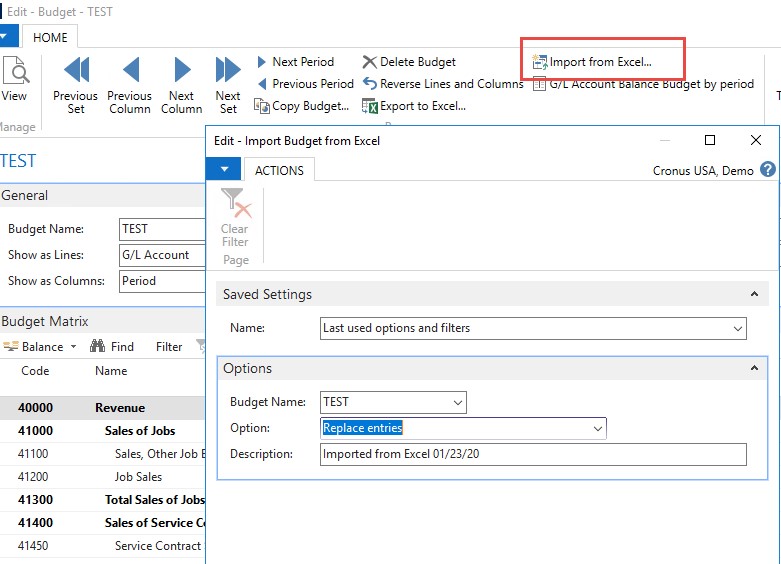
Definitions:
- Budget Name: Enter the Budget Name to import into.
- Options: Choose to Add or Replace entries
- Description: Add a description
Conclusion
As you can see, Business Central/NAV makes budgeting as painless a process as possible. You can easily create your budget, send out editable spreadsheets to your managers, and re-import the data to get your G/L budget going before you know it!
Want to see it in action? Fill out the short form below to watch a webinar I presented on this topic that walks you through the process step-by-step.